
Breaker Box w/mechanical interlock6268 viewsThis is the breaker box that is mounted on the truck. It has a 240V, 50A GFCI breaker, and a 20A 120V (dual) breaker.
Each breaker enables one of the charge ports. Only 1 can be "on" at a time due to the rather simple mechanical interlock.May 15, 2009
|
|
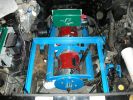
Motors Wired4250 viewsI wired the motors to the Z2K using 4/0 cable.
Notice that I don't like exposed High Voltage connections. Couldn't do much about the 1000A shunt though.Apr 29, 2009
|
|
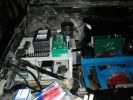
Central Wiring area4124 viewsThis is where most of the control wiring will be.
It's not done yet in this photo.
The meters are the AC Amps and Volts for the PFV-50 input.Apr 29, 2009
|
|
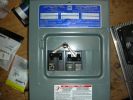
Mechanical link between Breakers3729 viewsThis shows how I made it so that only 1 of the 2 power inlet breakers can be ON at a time.
Both can be off, but only 1 can be ON.Apr 13, 2009
|
|
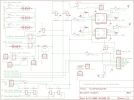
Pack Voltage System Schematic5871 viewsThis is the schematic for the Hi Voltage DC System.
It includes everything that connects to the pack.
I've left out a few of the hairball connections (like tach and tach sensor) that don't connect to anything else.
(Done with EagleCAD)Apr 13, 2009
|
|
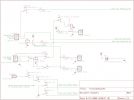
12V System Power Schematic5124 viewsThis is the schematic for the 12V System only. (Blowers, pumps, etc...)
(Done with EagleCAD)Apr 13, 2009
|
|
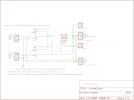
AC Power Schematic3582 viewsThis is the schematic for the AC inlet power.
There are both 120V (standard 20A plug) and 240V (CS6375) AC power inlets.
Each has a separate breaker, and only 1 breaker can be ON at a time due to a mechanical interlock. Apr 13, 2009
|
|
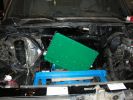
PFC-50 location5344 viewsEven with the huge engine compartment that used to hold a 460cui engine, I'm having trouble cramming everything in.
A PFC-50 charger is BIG, and while there is lots of free space, none of it is the right shape for the charger, or there are other things that will be there.
So, it looks like I'll be mounting the charger at the back of the engine bay, behind the battery box, but tilted up so that I can still reach the controls on it.Apr 10, 2009
|
|
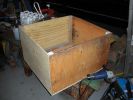
Front Battery Box plywood4015 viewsThis is the box that sits in the Engine compartment. It will hold 6 GC batteries.
I still have to insulate and fiberglass it.Apr 10, 2009
|
|

Front Battery Box mounting frame3836 viewsSince the front battery box can't just sit in a nice pre-built holder (i.e. the bed of the truck), I had to build a support framework for it.
This box will hold 6 GC batteries.Apr 10, 2009
|
|
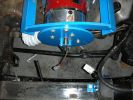
RPM sensor4667 viewsThis shows how I mounted the Z2K RPM sensor to the tailshaft of the motor.Apr 09, 2009
|
|
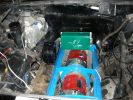
Blower Mounted2812 viewsAt the back left you can see where the Blower has been mounted. It blows down into the box I built, and there is a 3" flex tube running to the shroud on each motor.Apr 09, 2009
|
|
| 301 files on 26 page(s) |
 |
 |
4 |  |
 |
 |
 |
 |
 |
 |
|